Sports Equipment Manufacturer

Learn how to use cones in football training with five drills, football training with cones setup examples, progression steps, safety checks and FAQs guide.
Cones make a football training session easier to see and repeat. Set them out as a line, box, letter, or course; learn the movement at a controlled pace; then add the ball, a reaction cue, or a football-specific decision. The five useful patterns retained from the original guide are the 5-10-5 shuttle, X, L, W, and obstacle course. Treat every distance below as a starting example, not a universal rule.
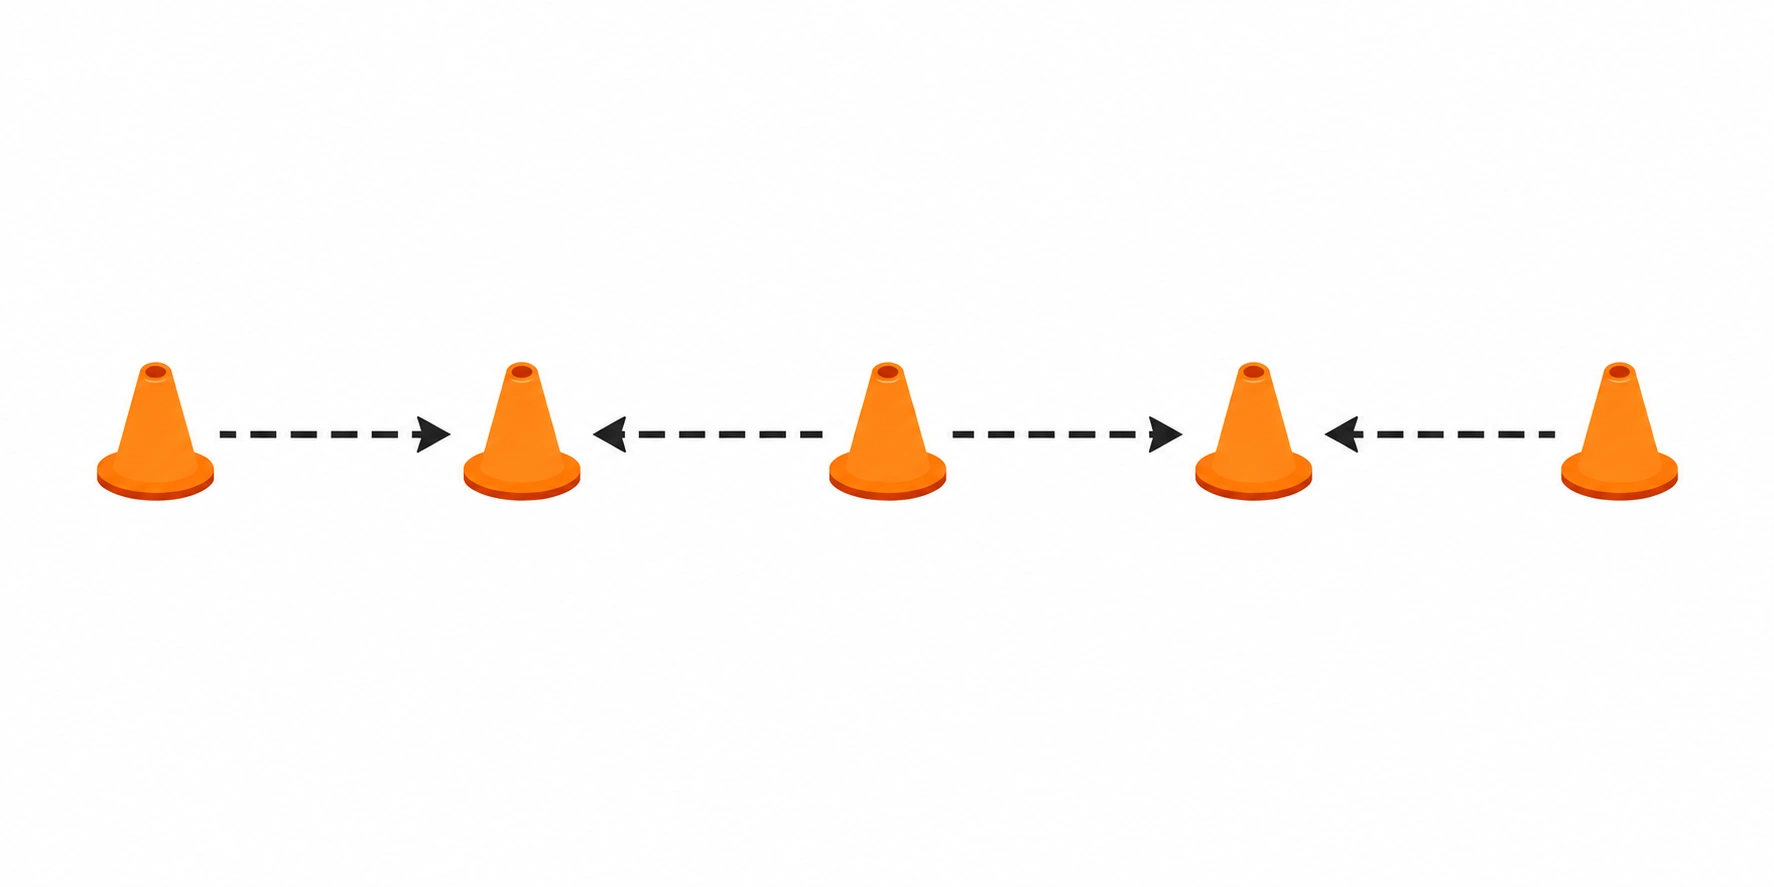
That makes football training with cones useful for organizing a repeatable task, but the cone pattern is only the starting point.
The best setup depends on the player’s objective, development, space, players, and materials. U.S. Soccer’s coaching guidance similarly frames activities around the player and environment, so adjust the layout instead of forcing every group into the same measurements.
Use cones to make one part of a movement visible: a change of direction, a dribbling gate, a sprint line, a backward-to-forward transition, or a space for a small-sided game. A simple session can follow this order:
Football training drills using cones stay connected to a football action when the route leads into a pass, turn, shot, or small-sided decision.
| Training goal | Starting cone idea | Useful next step |
|---|---|---|
| Change of direction | 5-10-5 line | Add a ball carry or a coach’s direction cue |
| Ball control | X or close-gate pattern | Use both feet, then add a scanning cue |
| Angle changes | L pattern | Receive or pass after the final turn |
| Repeated movement | W pattern | Add backward/forward decisions and a ball |
| Mixed skills | Obstacle course | Finish with a pass, dribble or small-sided action |
Start with the purpose, then choose the simplest layout that makes it clear. Treat spacing as an adjustable example: closer cones create a more compact route, while a larger layout leaves more room for the next action.
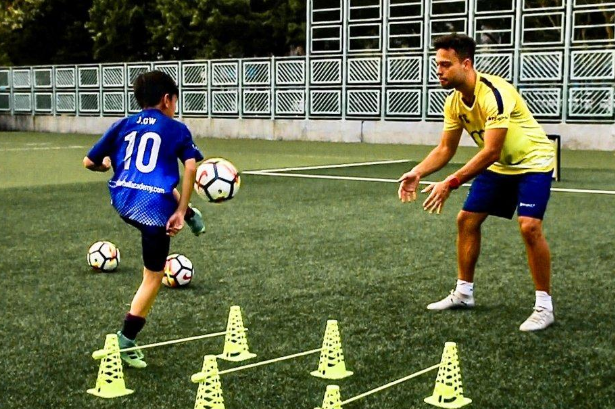
A cone set up for maneuverability should show the intended line clearly, with enough room to brake and exit.
| First question | Setup decision |
|---|---|
| What movement or skill is the priority? | Choose a line, angle, box, letter, or course that shows that movement. |
| Who is training? | Scale the distance and complexity to the player’s development and confidence. |
| How much space is available? | Reduce the route, not the safety margin; keep lanes and exits clear. |
| How many players are involved? | Use lanes or stations so players are not crossing one another. |
| What materials are available? | Use visible, stable markers and simplify when cones, balls, or goals are limited. |
U.S. Soccer’s session-planning resource emphasizes objectives, players, space, and materials; it does not prescribe these exact patterns or measurements. Use fewer turns and more space for newer players; add a decision or ball constraint for experienced players.
The original article’s five patterns remain useful because they give a coach or individual player a progression of shapes. Use this setup table first; each count and distance is a legacy starting example to adjust to the player, space and objective.
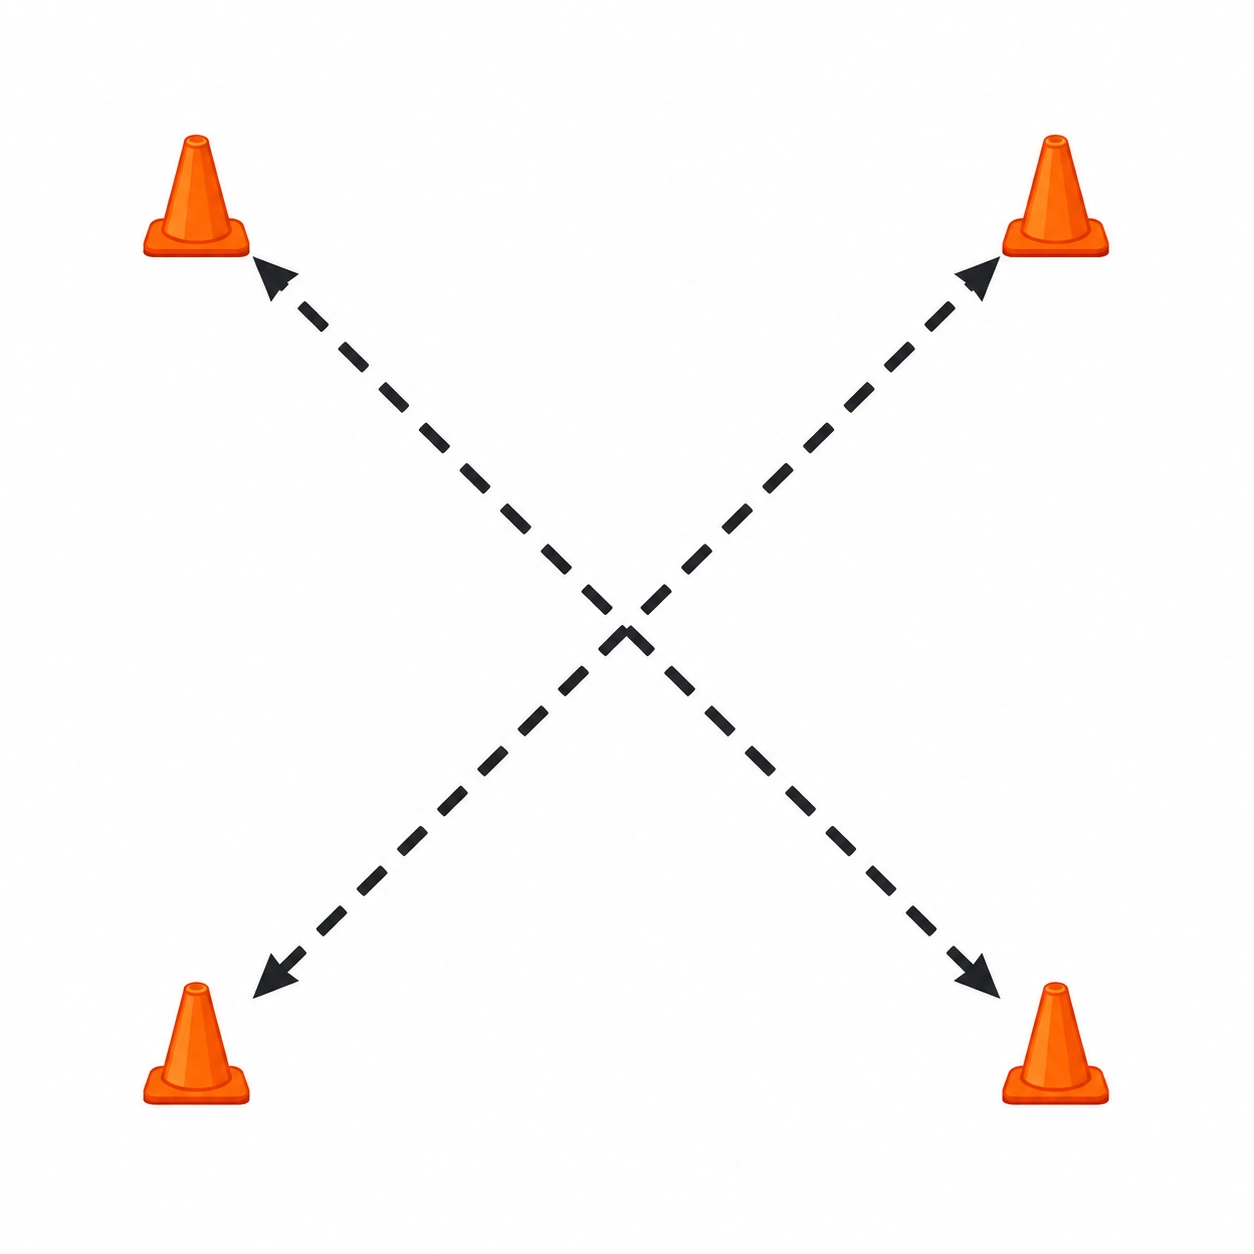
| Drill | Legacy starting setup | Movement focus | Practical progression |
|---|---|---|---|
| 5-10-5 shuttle | 3 cones in a line; legacy example uses about 5 yards between points | forward sprint, turn, return | no ball → ball carry → direction cue |
| X drill | 4 cones in a crossing/square shape; legacy example uses about 10 yards between points | diagonal movement and body orientation | no ball → ball → partner cue |
| L drill | 3-4 cones in an L shape | right-angle turn and exit | no ball → ball → pass at exit |
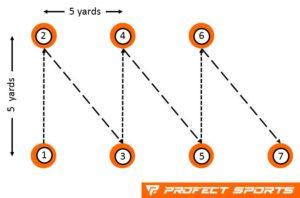
| W drill | 7 cones in a W; legacy example uses about 5 yards between points | forward, backward and angled changes | route cue → ball → decision cue |
| Obstacle course | 10-15 cones; legacy example uses about 4 yards between points | weave, gate, turn and exit | walk-through → dribble → football action |
Setup: Use three cones in a straight line. The legacy guide uses about 5 yards between cones as a starting example.
Movement: Start at the middle cone. Drive to one outside cone, change direction to the far cone, then return through the middle. Keep the route clear.
Purpose: This pattern rehearses acceleration, deceleration and changes of direction. It is not a guarantee of speed or agility and should not be presented as a universal test distance.
Progression: Run the route without a ball first. Add a ball carry, then ask the player to respond to a left/right cue. Finish with a pass or dribble into a marked target.
Setup: Place four cones as an X or crossing route. The legacy guide uses a larger square-style example, around 10 yards between cones, but the route can be scaled to the available area.
Movement: Move diagonally between points, change direction at the outside cone, and return across the shape. Demonstrate the route so crossing lanes stay clear.
Purpose: The X pattern gives diagonal movement and body-orientation changes. Keep it simple enough for control and looking up.
Progression: Begin without a ball, add a ball at walking pace, then add a partner’s visual cue. Finish with a pass or receiving touch.
Setup: Arrange three or four cones in an L shape with a clear start, corner, and exit. The legacy article presents the L as a directional movement pattern; its exact spacing is an example to adjust rather than a fixed requirement.
Movement: Sprint or move to the corner, plant under control, turn around the corner, and continue to the exit cone. Keep the shoulders and hips oriented toward the next action instead of cutting across the cone.
Purpose: The L emphasizes a right-angle change and transition between lanes. Observe whether the player slows enough to turn with control.
Progression: Add a ball after the first clean route, then have a partner call the exit side or play a short pass.
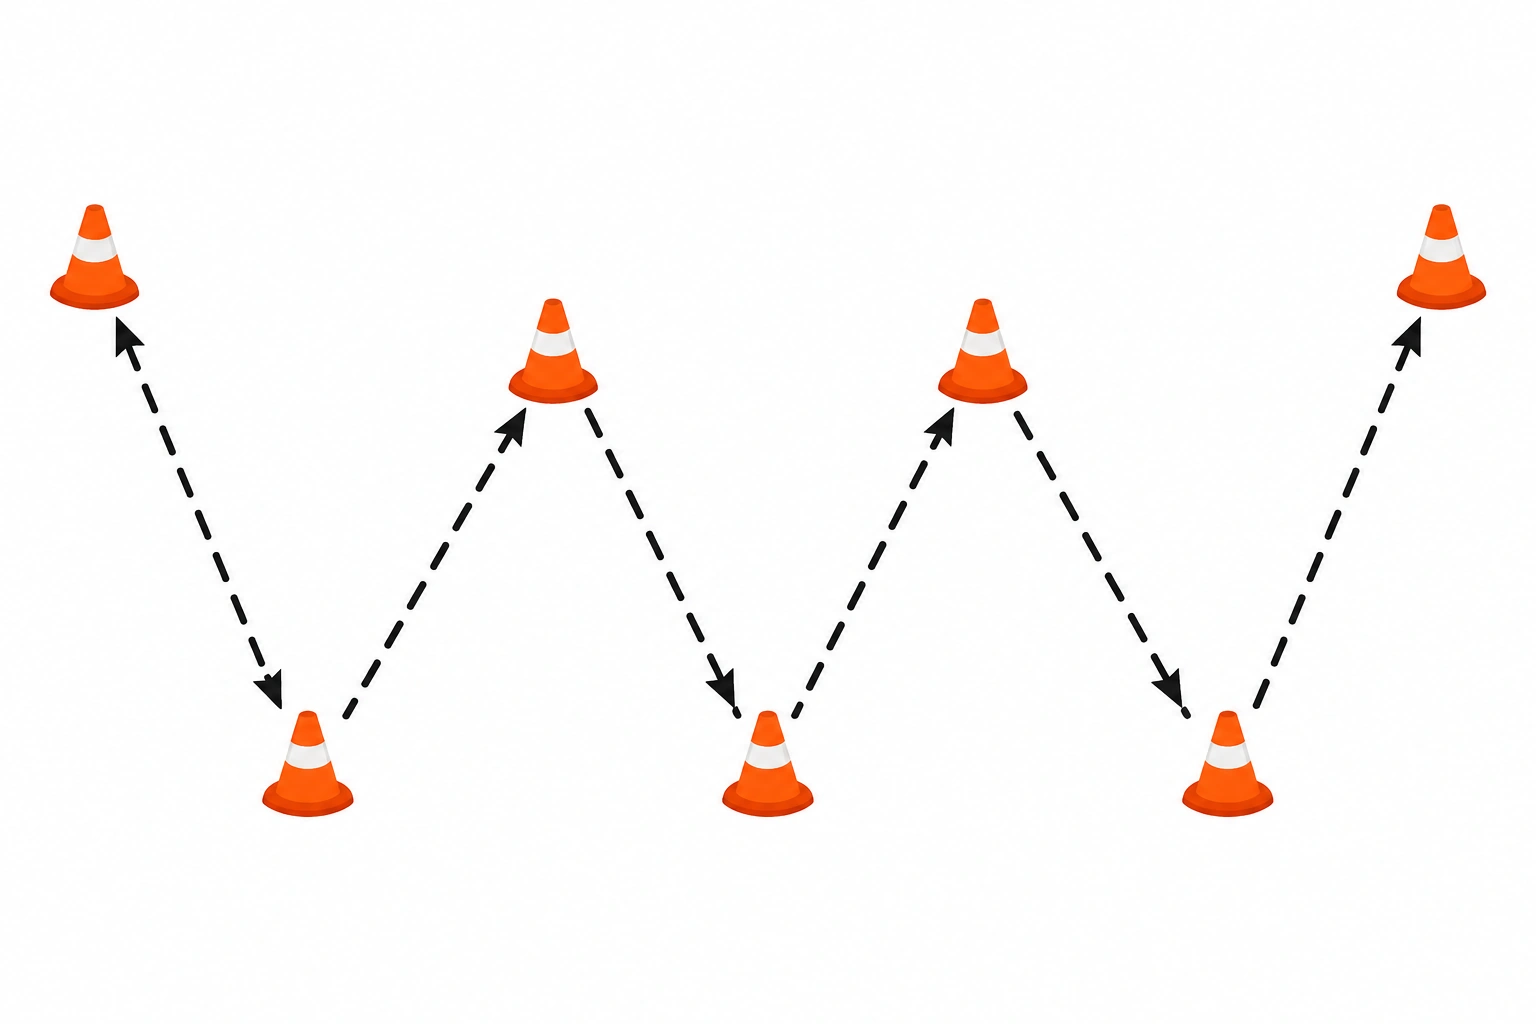
Setup: Use seven cones to form a W, as in the legacy guide, with the starting example of roughly 5 yards between points. Make the shape wide enough for the player to turn without colliding with another lane.
Movement: Travel forward, change direction, move backward or diagonally as instructed, then continue through the points. Walk the route once before adding pace.
Purpose: The W combines forward, backward and angled movement. It is more complex than a line, so quality and spacing matter more than speed.
Progression: Use a color or number cue to select the next cone. Add the ball after the player can keep the route and look up. Finish with a turn or pass.
Setup: Build a short route with 10-15 cones or another manageable number. The old guide uses about 4 yards between cones as one example; shorten or widen the route according to the drill goal and space.
Movement: Combine a weave, gate, turn, and exit line. Number the stations or use different cone colors so the player knows the order. Leave a clear entry and exit rather than closing the course into a crowded loop.
Purpose: An obstacle course combines several simple patterns in one sequence. It is useful for organizing stations, but it should not be described as proof that a player’s athleticism has been maximized.
Progression: Start with a no-ball walk-through, then add controlled dribbling. Add a reaction cue at one station and a pass, shot, or small-sided action at the end.
The original guide connects cone work with speed, flexibility, agility and footwork. Keep that framing as a description of training aims, not a promise: cones make a route visible, but they cannot by themselves prove faster play, greater flexibility or improved match performance. Start at a controlled pace, raise speed only while route and body control stay clear, and use a short rest or simpler route when quality falls.
Questions about cone work often come down to transfer: a player can complete a pattern alone, but the match includes a ball, opponents, teammates, pressure, and changing information. Use four stages:
If movement quality falls, simplify one variable. Increase space, remove a turn, reduce speed, or add a short rest. Making cones closer is only one possible progression and is not automatically harder in a useful way. In other words, “cone work football training” is a building block rather than proof of performance; the discovery material includes questions about match transfer.
Use this as a template, then adapt it to the group and venue. The planning principle is to keep the objective, players, space and materials aligned. See the U.S. Soccer training-session resource for the planning context.
| Minutes | Activity | Coaching focus |
|---|---|---|
| 0-3 | Free movement and light ball touches | Show the space and check that players can move without crossing lanes |
| 3-7 | 5-10-5 or L pattern, no ball | Explain the route; keep turns controlled |
| 7-12 | X or W pattern with a ball | Keep touches close enough for the player to stay in control |
| 12-16 | Reaction cue or partner pass | Add one decision without changing every variable at once |
| 16-19 | Obstacle course to a pass, turn or shot | Connect the pattern to a football action |
| 19-20 | Reset and equipment check | Clear the area and note what should change next session |
Use visible, stable cones and keep an entry and exit for every lane. Start controlled and raise effort only while route, body and ball control remain clear. Check the surface and venue guidance before high effort; rest or simplify when control falls. This is practical session guidance, not a medical protocol or safety guarantee.
| Symptom | Possible cause | Verify | Fix |
|---|---|---|---|
| Players cut corners or collide | Route is crowded or the exit is unclear | Walk the route and watch lane crossings | Add space, remove a station, or split the group into lanes |
| Movement becomes sloppy | Pace or complexity is too high | Compare the first and latest repetitions | Reduce one variable, add a short rest, and rebuild quality |
| Cone work feels disconnected | No ball, cue, or football action follows | Check the planned progression | Add a ball, reaction cue, partner, pass, or small-sided finish |
| Cones are unavailable or unstable | The venue/materials changed | Check who supplies equipment and whether markers stay visible | Simplify with safe, stable markers or postpone the route; do not create a trip hazard |
For a project-specific comparison, readers can review LDK Sports Equipment’s football and soccer-field equipment or send an inquiry after defining the training setup. Confirm dimensions, venue rules, setup responsibility, storage, and purchasing terms directly; this reference does not establish certification, availability, engineering, installation, delivery, or training performance.
They can make a defined movement repeatable, but add the ball, a reaction cue, or an opponent-context activity before treating the practice as football-specific.
Start with a simple line, gate, or X pattern that matches the ball-control goal, then add both-foot touches, a cue, and a football action.
Use the line layout as a starting example and adjust the spacing to the player, available space, and purpose; the number is not a universal prescription.
Combine cone movement with ball work, reaction and football-specific play inside a session that protects movement quality rather than chasing a fixed speed claim.
Use clearly visible, stable markers only when the surface and space are appropriate, and simplify the layout instead of creating a trip hazard.
Cone patterns rehearse movement, but anticipation needs an external cue, partner, or opponent-like decision stage.
To use cones in football training, choose a simple shape for the movement you want to rehearse, give players a clear route, and progress from no-ball movement to ball work, reaction, and football context. The 5-10-5, X, L, W and obstacle-course patterns from the original guide remain useful starting points. Adjust their size, complexity and effort to the player, space, materials and session goal rather than treating an old measurement as a rule.
Old article URL: https://www.ldksportsequipment.com/how-to-use-cones-in-football-training.html